
In this post, we will delve into how to create a docker image for spring boot application. Let’s kick off by exploring the essential prerequisites for generating an image through Docker.
Prerequisites:
Before diving into the Docker installation, It’s important to note that Docker has a dependency on WSL (Windows Subsystem Linux).
If WSL is not already installed on your system, follow the steps outlined below before proceeding with the Docker installation. If you have WSL set up, feel free to skip ahead to the Docker installation section.
WSL Installation Steps:
Open Windows PowerShell on your system.
Execute the following command in the PowerShell, which will install WSL2 by default.
C:Userscodespy>wsl --installAfter successfully installing WSL2, proceed by downloading Docker Desktop here. Once your Docker setup is in place, you’re ready to embark on the next steps with me.
To illustrate the process of creating a Docker image, let’s employ a sample project—I’ll use the Online Hotel Booking Management System from my previous work.
While you can learn more about this project, it’s important to note that understanding the project specifics isn’t necessary for creating the image. I’ll guide you through every step in this post, covering both the frontend and backend applications.
Starting with the backend, we’ll be utilizing the Spring Tool Suite as the IDE. If you’re unfamiliar with this IDE, you can refer to this video.
Now, let’s dive into creating an image for our Spring Boot microservice application. Begin by making a few adjustments to your project.
- Open the
pom.xmlfile and update the build plugin with the following configuration:
<build>
		<plugins>
			<plugin>
				<groupId>org.springframework.boot</groupId>
				<artifactId>spring-boot-maven-plugin</artifactId>
				<configuration>
					<image>
						<name>codespy/mmv2-${project.artifactId}:${project.version}</name>
					</image>
					<pullPolicy>IF_NOT_PRESENT</pullPolicy>
				</configuration>
			</plugin>
		</plugins>
</build>If the build plugin hasn’t been defined, insert the provided code into your pom.xml file. If it’s already present, simply append the configuration from lines 6 to 11.
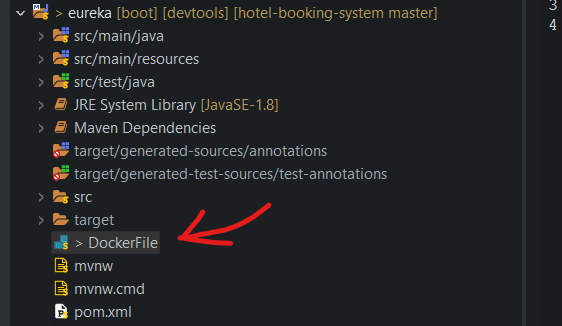
Subsequently, generate a DockerFile in your project’s root folder, ensuring that the filename is precisely “DockerFile” with correct case sensitivity. Using any alternative name may lead to functionality issues.
Add these configurations in DockerFile.
FROM java:8-jdk
EXPOSE 8761
ADD eureka-0.0.1-SNAPSHOT.jar eureka-server.jar
ENTRYPOINT ["java", "-Djava.security.egd=file:/dev/./urandom", "-jar", "eureka-server.jar"]The FROM directive specifies a base image upon which your application image is built. This image includes the Java runtime environment necessary for running Java applications.
In case the base image isn’t present locally, Docker will retrieve it from the Docker Hub.
The port 8761 is designated for the Docker container to listen to your application. The process involves copying the application JAR file and giving it a distinct name.
The EntryPoint is configured to include all the information or commands to execute within the container during runtime.
Follow the same steps for other microservices. After adding all these configurations, we are ready to build the image. Do right-click on your project and select Run As → Maven build…
Then define goals, something like this:-
spring-boot:build-image -DskipTestsOnce, you define goals, click on run. Make sure docker desktop is running, otherwise, it will not be able to build an image of your application.
It will take some time and once it is done, you will see a build success message on the console.

To streamline the image creation process for other applications, follow these identical steps. This procedure ensures the generation of an image for your backend or microservices application.
For the frontend, which employs Angular, the image creation process for the client application involves the following steps:
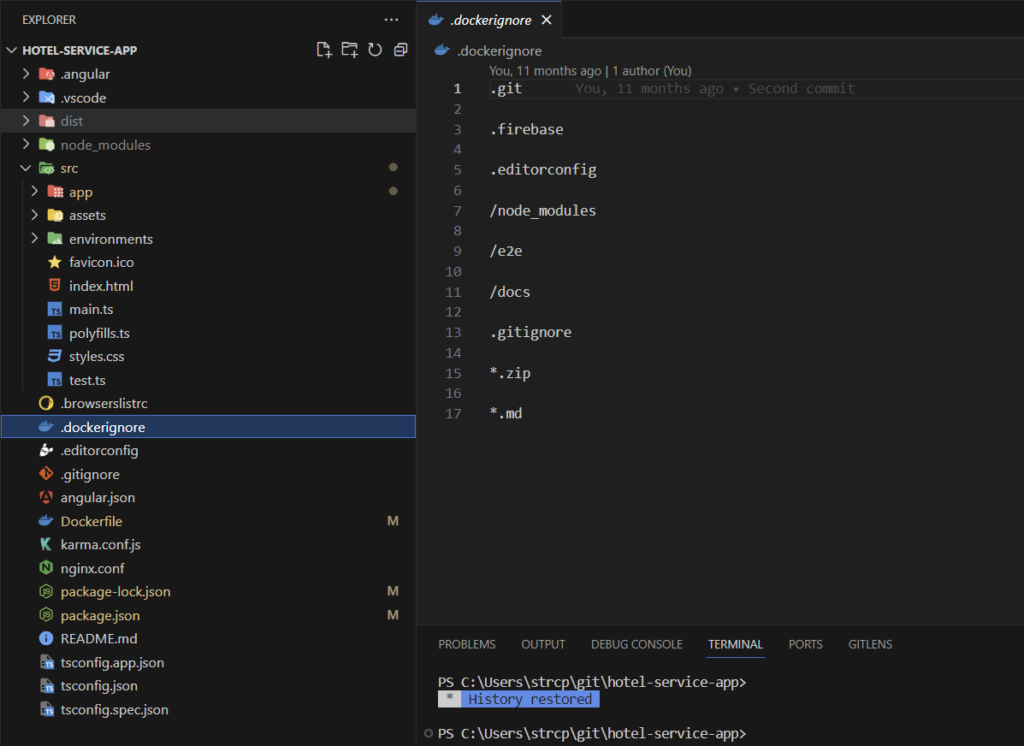
Create a Dockerfile in the frontend directory. It’s crucial to name the file “Dockerfile.”
Add the specified configurations to this Dockerfile.
### STAGE 1: Build ###
FROM node:20.9.0-alpine AS build
WORKDIR /usr/src/app
COPY package.json package-lock.json ./
RUN npm install
COPY . .
RUN npm run build
### STAGE 2: Run ###
FROM nginx:1.17.1-alpine
COPY nginx.conf /etc/nginx/nginx.conf
COPY --from=build /usr/src/app/dist/hotel-service-app /usr/share/nginx/htmlIn the first stage, you’ll find configurations dedicated to building your project, while the second stage is responsible for crafting the image of your application.
For this image creation, we leverage the nginx server, which comes with its distinct set of configurations.
To implement this, establish a file named “nginx.conf” within your project’s root folder and incorporate these configurations into the file.
events{}
http {
    include /etc/nginx/mime.types;
    server {
  listen 80;
    location / {
    add_header "Access-Control-Allow-Origin" "*";
    add_header 'Access-Control-Allow-Methods' 'GET, POST, OPTIONS, PUT, DELETE';
    add_header 'Access-Control-Allow-Headers' 'X-Requested-With,Accept,Content-Type, Origin';
    root /usr/share/nginx/html;
    index index.html index.htm;
    try_files $uri $uri/ /index.html =404;
    }
    }
}While building the docker image, you can also maintain docker ignore file to ignore the scanning for unnecessary files, repository or dependency etc.,
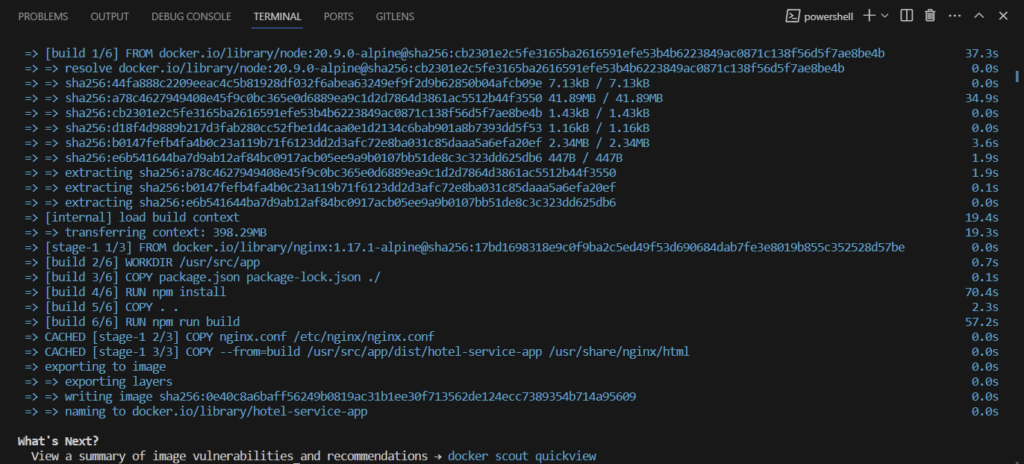
Now, we are ready to create an image of client application. Paste this command on the terminal and hit enter.

After build completion, you will see logs on your terminal.
Now, we are ready with docker image for both frontend and backend application. We will use docker compose to run both frontend and backend application.
Docker compose is one of the best tool to run multiple containers at once. For that, we need to create docker-compose.yml and add all the image information.
version: "3.8"
services:
  zipkin-server:
    image: openzipkin/zipkin:2.23
    mem_limit: 300m
    ports:
      - "9411:9411"
    networks:
      - hotel-microservices-network
  mysqldb:
    image: mysql:latest
    networks:
      - hotel-microservices-network
    environment:
      MYSQL_ROOT_PASSWORD: 123
      MYSQL_PASSWORD: 123
    ports:
      - "3307:3306"
    volumes:
      - ./init:/docker-entrypoint-initdb.d
  eureka-server:
    image: codespy/mmv2-eureka:0.0.1-SNAPSHOT
    mem_limit: 700m
    ports:
      - "8761:8761"
    networks:
      - hotel-microservices-network
  hotel-config-server:
    image: codespy/mmv2-config:0.0.1-SNAPSHOT
    mem_limit: 700m
    ports:
      - "9700:9700"
    networks:
      - hotel-microservices-network
    depends_on:
      - eureka-server
    environment:
      EUREKA.CLIENT.SERVICEURL.DEFAULTZONE: http://eureka-server:8761/eureka
      SPRING.ZIPKIN.BASEURL: http://zipkin-server:9411/
  api-gateway:
    image: codespy/mmv2-api-gateway:0.0.1-SNAPSHOT
    environment:
      EUREKA.CLIENT.SERVICEURL.DEFAULTZONE: http://eureka-server:8761/eureka
      SPRING.ZIPKIN.BASEURL: http://zipkin-server:9411/
    ports:
      - "9500:9500"
    depends_on:
      - eureka-server
      - hotel-config-server
    networks:
      - hotel-microservices-network
  auth-service:
    image: codespy/mmv2-auth:0.0.1-SNAPSHOT
    environment:
      EUREKA.CLIENT.SERVICEURL.DEFAULTZONE: http://eureka-server:8761/eureka
      SPRING.ZIPKIN.BASEURL: http://zipkin-server:9411/
    ports:
      - "9508:9508"
    networks:
      - hotel-microservices-network
    depends_on:
      - eureka-server
      - hotel-config-server
  user-service:
    image: codespy/mmv2-user-service:0.0.1-SNAPSHOT
    environment:
      SPRING.DATASOUCE.URL: jdbc:mysql://mysqldb:3306/user_service?useSSL=false
      EUREKA.CLIENT.SERVICEURL.DEFAULTZONE: http://eureka-server:8761/eureka
      SPRING.ZIPKIN.BASEURL: http://zipkin-server:9411/
    ports:
      - "9501:9501"
    networks:
      - hotel-microservices-network
    depends_on:
      - eureka-server
      - hotel-config-server
      - mysqldb
  invoice-service:
    image: codespy/mmv2-invoice-service:0.0.1-SNAPSHOT
    environment:
      SPRING.DATASOUCE.URL: jdbc:mysql://mysqldb:3306/invoice_service?useSSL=false
      EUREKA.CLIENT.SERVICEURL.DEFAULTZONE: http://eureka-server:8761/eureka
      SPRING.ZIPKIN.BASEURL: http://zipkin-server:9411/
    ports:
      - "9503:9503"
    networks:
      - hotel-microservices-network
    depends_on:
      - eureka-server
      - hotel-config-server
      - mysqldb
  hotel-service:
    image: codespy/mmv2-hotel-service:0.0.1-SNAPSHOT
    environment:
      SPRING.DATASOUCE.URL: jdbc:mysql://mysqldb:3306/hotel_service?useSSL=false
      EUREKA.CLIENT.SERVICEURL.DEFAULTZONE: http://eureka-server:8761/eureka
      SPRING.ZIPKIN.BASEURL: http://zipkin-server:9411/
    ports:
      - "9502:9502"
    networks:
      - hotel-microservices-network
    depends_on:
      - eureka-server
      - hotel-config-server
      - mysqldb
  angular:
    image: 0e40c8a6baff
    ports:
      - "4200:80"
    networks:
      - hotel-microservices-angular
volumes:
  db_data:
networks:
  hotel-microservices-network:
hotel-microservices-angular: After adding all these configurations in docker-compose file, just go the directory, where you have created this file, open terminal and execute this command.
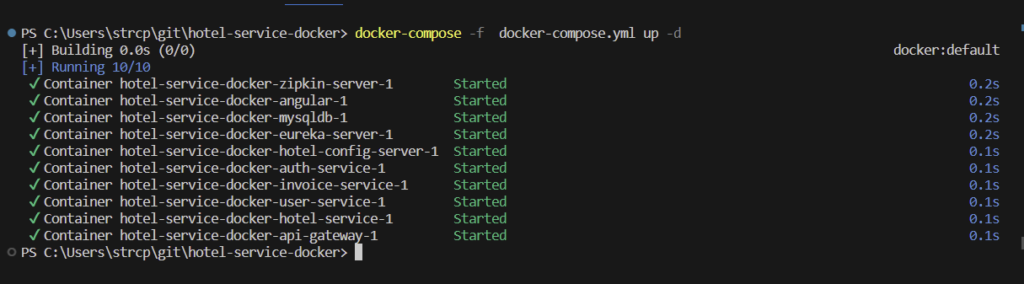
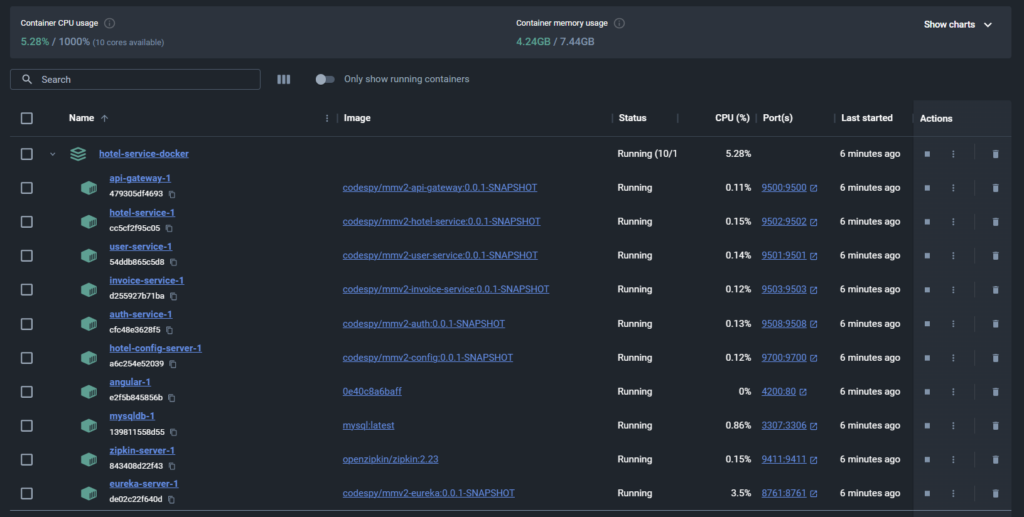
docker-compose -f docker-compose.yml up -dAfter running this command, it will run all the images as docker container.
You can also check docker desktop to know the status of running containers.
In this way, you can create a docker image of your application and run it. I hope, you are able to create image for your application.
If still facing any issue, you can comment, or you can contact us. We will reply you as soon as possible.