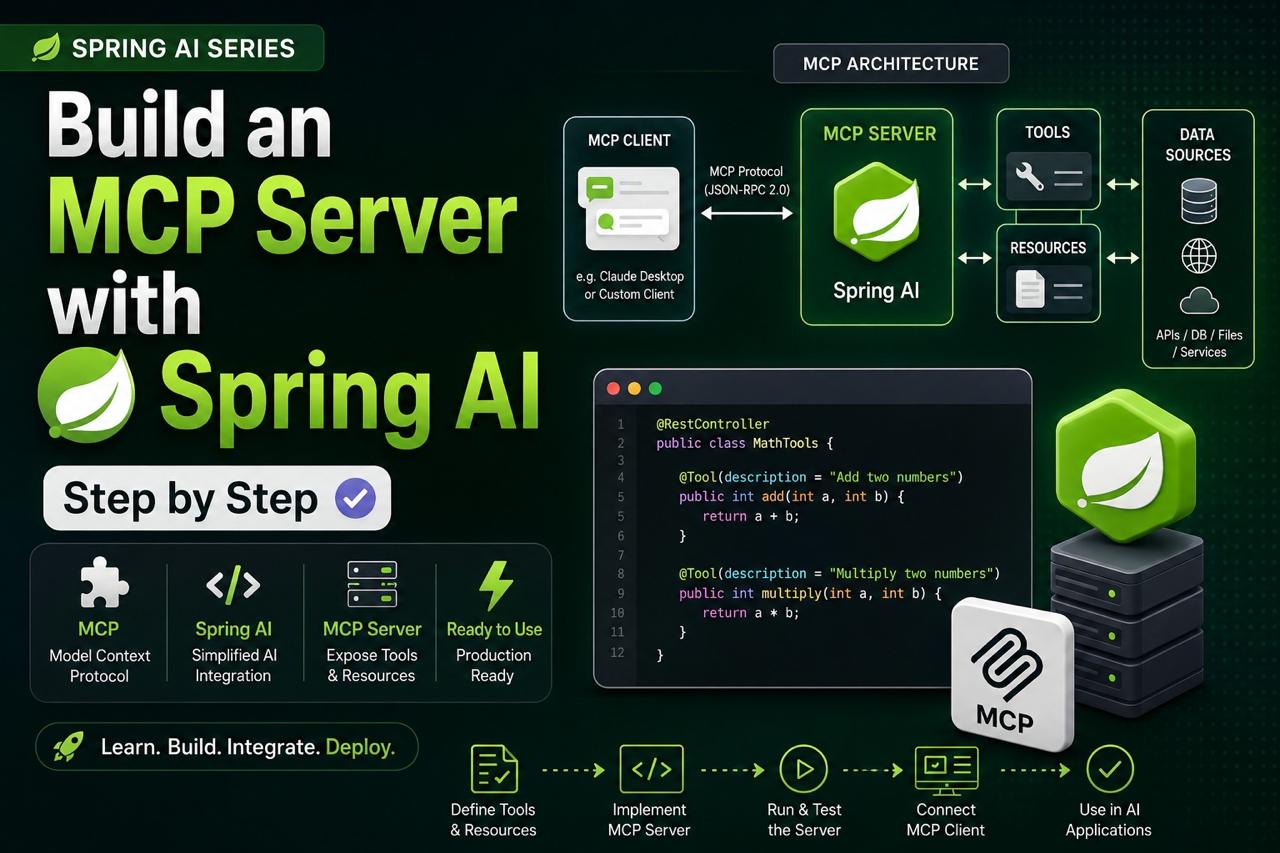
Build an MCP Server with Spring AI – Step by Step
Build an MCP Server with Spring AI : In our last post, we talked about RAG and how it helps your AI model answer questions using your own private data. Today we are moving to another very interesting topic in the Spring AI series — building an MCP Server.
I have made a full video on this topic too, you can watch it here:
More posts like this one are in my Spring AI category.
The Use Case
Let’s take a simple, real-world example. Imagine your manager comes to you and asks — can our AI bot open Jira stories for the team, for the current sprint? Can it also tell us what tickets are open, and can it update ticket status when needed?
This is exactly the kind of thing an MCP Server is built for. Instead of hardcoding this logic into your chatbot, you expose these Jira related actions as tools, and any MCP client can connect to your server and use them. Whenever a user asks something related to Jira stories, the MCP client will talk to the MCP server, and the server will return the response back.
So today we’ll build this Jira MCP server, step by step.
Tech Stack
- Maven project
- Java 21
- Spring AI, version 2.0.0-RC1
- Spring Boot Starter Web and WebMVC
- spring-ai-starter-mcp-server
Step 1: pom.xml Dependencies
We need the MCP server starter, Spring Boot Starter Web, and WebMVC. We are using the BOM model for Spring AI, and its version here is 2.0.0-RC1.
<?xml version="1.0" encoding="UTF-8"?>
<project xmlns="http://maven.apache.org/POM/4.0.0" xmlns:xsi="http://www.w3.org/2001/XMLSchema-instance"
	xsi:schemaLocation="http://maven.apache.org/POM/4.0.0 https://maven.apache.org/xsd/maven-4.0.0.xsd">
	<modelVersion>4.0.0</modelVersion>
	<parent>
		<groupId>org.springframework.boot</groupId>
		<artifactId>spring-boot-starter-parent</artifactId>
		<version>4.0.6</version>
		<relativePath/> <!-- lookup parent from repository -->
	</parent>
	<groupId>com.example</groupId>
	<artifactId>mcpserver</artifactId>
	<version>0.0.1-SNAPSHOT</version>
	<name/>
	<description/>
	<url/>
	<licenses>
		<license/>
	</licenses>
	<developers>
		<developer/>
	</developers>
	<scm>
		<connection/>
		<developerConnection/>
		<tag/>
		<url/>
	</scm>
	<properties>
		<java.version>21</java.version>
		<spring-ai.version>2.0.0-RC1</spring-ai.version>
	</properties>

	<dependencyManagement>
		<dependencies>
			<dependency>
				<groupId>org.springframework.ai</groupId>
				<artifactId>spring-ai-bom</artifactId>
				<version>${spring-ai.version}</version>
				<type>pom</type>
				<scope>import</scope>
			</dependency>
		</dependencies>
	</dependencyManagement>

	<dependencies>
		<dependency>
			<groupId>org.springframework.boot</groupId>
			<artifactId>spring-boot-starter-web</artifactId>
		</dependency>
		<dependency>
			<groupId>org.springframework.boot</groupId>
			<artifactId>spring-boot-starter-webmvc</artifactId>
		</dependency>
		<dependency>
			<groupId>org.springframework.ai</groupId>
			<artifactId>spring-ai-starter-mcp-server</artifactId>
		</dependency>
	</dependencies>

	<build>
		<plugins>
			<plugin>
				<groupId>org.springframework.boot</groupId>
				<artifactId>spring-boot-maven-plugin</artifactId>
			</plugin>
		</plugins>
	</build>

</project>
Step 2: application.properties — MCP Server Configuration
Now we go to application.properties and add the MCP server related configuration.
spring.application.name=mcpserver

spring.main.web-application-type=none

spring.ai.mcp.server.name=jira-mcp-server
spring.ai.mcp.server.version=1.0.0
spring.ai.mcp.server.stdio=true

spring.main.banner-mode=off

logging.config=classpath:logback-spring.xml
Let’s go through this one by one, because every single line here matters:
spring.ai.mcp.server.name— this is the server name for your MCP application. This is the same name you will use later when you create the MCP client and connect it to this server.spring.ai.mcp.server.version— just a version number for your server, we set it to 1.0.0.spring.ai.mcp.server.stdio=true— for client to server communication, we are using stdio transport. This means the communication is not HTTP or Tomcat based, it’s a local, process-to-process communication. That’s exactly why we also setspring.main.web-application-type=none— we don’t need a web server running at all here.spring.main.banner-mode=off— this one is important. Normally, whenever you run a Spring Boot application, it prints that big Spring Boot banner on startup. But since we are using stdio transport, and stdio internally uses the JSON-RPC 2.0 format for communication, this banner text will break that format. JSON-RPC 2.0 does not understand banners, and if you don’t disable it, the client to server communication will simply throw an error and fail to connect.logging.config=classpath:logback-spring.xml— now, if you’re wondering, “if I can’t have console output, how do I even log anything?”, the answer is: you don’t disable logging, you just redirect it. We use an XML based Logback configuration instead of the default console logs.
Step 3: logback-spring.xml
We create this file inside src/main/resources. The important part here is that all logs go to System.err (stderr), not System.out (stdout) — because stdout is reserved purely for JSON-RPC messages between the client and the server.
<?xml version="1.0" encoding="UTF-8"?>
<configuration>
    <appender name="STDERR" class="ch.qos.logback.core.ConsoleAppender">
        <target>System.err</target>
        <encoder>
            <pattern>%d{HH:mm:ss.SSS} [%thread] %-5level %logger{36} - %msg%n</pattern>
        </encoder>
    </appender>

    <root level="INFO">
        <appender-ref ref="STDERR"/>
    </root>

    <logger name="org.springframework.ai" level="DEBUG"/>
    <logger name="io.modelcontextprotocol" level="DEBUG"/>
</configuration>
We use the STDERR appender here, so all our logs go to System.err. This keeps System.out completely clean for the JSON-RPC 2.0 protocol.
Step 4: Building the Jira Tools
Now let’s go back to our original use case. The manager asked — can the AI bot open Jira stories for the current sprint? So whenever a user asks any question related to Jira stories, the MCP client will talk to our MCP server, and the server needs to return the response.
For this, we create a package called jira, and inside it, a service class called JiraToolsService, annotated with @Service.
package com.example.mcpserver.jira;

import org.slf4j.Logger;
import org.slf4j.LoggerFactory;
import org.springframework.ai.tool.annotation.Tool;
import org.springframework.stereotype.Service;

import java.util.List;

@Service
public class JiraToolsService {

    // Add this logger — never use System.out in an MCP Server
    private static final Logger log = LoggerFactory.getLogger(JiraToolsService.class);

    @Tool(name = "getOpenTickets",
            description = "Get open Jira tickets for a project. "
                    + "Use when the user asks about open issues, bugs, tasks, "
                    + "sprint work, or what the team is working on. "
                    + "Returns ticket ID, summary, assignee, and priority.")
    public List<JiraTicket> getOpenTickets(String projectKey) {
        return List.of(
                new JiraTicket(projectKey + "-101", "Login timeout after 5 mins",  "alice", "High"),
                new JiraTicket(projectKey + "-102", "Dashboard crashes on Safari", "bob",   "Medium"),
                new JiraTicket(projectKey + "-103", "Export CSV missing headers",  "none",  "Low")
        );
    }

    @Tool(name = "createTicket",
            description = "Create a new Jira ticket in a given project. "
                    + "Use when the user asks to log a bug, create a task, "
                    + "report an issue, or add a story. "
                    + "Returns the new ticket ID e.g. PROJ-104.")
    public String createTicket(String projectKey,
                               String summary,
                               String description,
                               String issueType) {
        String newId = projectKey + "-104";
        // logger goes to stderr via logback-spring.xml — stdout stays clean
        log.info("[STUB] Created {}: {} ({})", newId, summary, issueType);
        return newId;
    }

    @Tool(name = "updateTicketStatus",
            description = "Update the status of an existing Jira ticket. "
                    + "Use when the user wants to close, resolve, reopen, "
                    + "or transition a ticket. Valid statuses: Open, In Progress, Done, Closed.")
    public String updateTicketStatus(String ticketId, String newStatus) {
        // logger goes to stderr — never System.out
        log.info("[STUB] {} transitioned to: {}", ticketId, newStatus);
        return ticketId + " updated to: " + newStatus;
    }

    record JiraTicket(String id, String summary,
                      String assignee, String priority) {}
}
Here we have created three tools, and each one is basically just a method, marked with @Tool — this is very similar to function calling in Spring AI (I already have a separate video on function calling if you want to understand that first).
- getOpenTickets — whenever the user asks something like “get open Jira tickets for a project”, this tool executes. Notice the description carefully: “Use when the user asks about open issues, bugs, tasks, sprint work, or what the team is working on.” This description is not just a comment for humans, it is what the AI model actually reads to decide when to call this method. It returns a list of
JiraTicketrecords, each containing the ticket ID, summary, assignee, and priority. HereJiraTicketis simply a record with these four fields. - createTicket — this tool runs whenever a user wants to create a new Jira ticket. It accepts the project key, summary, description, and issue type as parameters, and it returns the newly created ticket ID.
- updateTicketStatus — this one runs when the ticket already exists and the user wants to update something in it, like closing, resolving, reopening, or transitioning a ticket.
So in total, our Jira tool service supports three operations — get open tickets, create tickets, and update ticket status. Whenever a user asks a Jira related question, the MCP server comes to this exact place, the model figures out which method to call, fetches the information, and returns it back.
Step 5: Registering the Tools with the MCP Server
At this point our service is ready, but it is still not registered with the MCP server. If we don’t register it, the MCP server has no idea this class even exists, and the model will never be able to reach it.
For this, we create one more class — a configuration class called McpServerConfig.
package com.example.mcpserver.jira;

import org.springframework.ai.tool.ToolCallbackProvider;
import org.springframework.ai.tool.method.MethodToolCallbackProvider;
import org.springframework.context.annotation.Bean;
import org.springframework.context.annotation.Configuration;

@Configuration
public class McpServerConfig {

    @Bean
    ToolCallbackProvider jiraTools(JiraToolsService svc) {
        return MethodToolCallbackProvider.builder()
                .toolObjects(svc)
                .build();
    }
}
Here we define a bean of type ToolCallbackProvider, and inside it we use MethodToolCallbackProvider, passing our JiraToolsService object to toolObjects(). This one bean is what actually registers all your @Tool annotated methods from JiraToolsService to the MCP discovery protocol, at the MCP layer.
So after this line, all our Jira related tools are officially registered with the MCP server. Our Jira tool service is ready, all the Jira related methods are defined, and all of them are now discoverable by any MCP client that connects to this server.
Step 6: Building the Jar
Since we are using stdio for client to server communication in this project, you don’t need to keep this application “running” separately like a normal web server. There is no Tomcat, no WebSocket, no HTTP endpoint involved here. Instead, whenever an MCP client wants to talk to this server, it simply needs the path to this server’s jar file.
So the first thing we need to do is build a jar of this MCP server project:
mvn clean install
Once the build is successful, you will find the jar file inside the target folder — something like mcpserver-0.0.1-SNAPSHOT.jar. Later, when we create our MCP client, we will simply provide the path to this jar file, and the client will directly execute it.
Wrapping Up
So that’s everything for building our MCP server. Let’s do a quick recap: we set up the project with the MCP server starter dependency, configured stdio based transport in application.properties, disabled the Spring Boot banner and redirected all logs to stderr so JSON-RPC 2.0 communication doesn’t break, and then we built three Jira related tools (get open tickets, create ticket, update ticket status) and registered them with the MCP server using ToolCallbackProvider.
In the next part of this series, we are going to build the MCP client application, and then a host application, so we can actually send a request from a real user and see this entire client-server connectivity working end to end.
If you have any doubts, drop a comment below. And if you found this useful, please share it with your friends and subscribe to the channel for the rest of this series.
More Spring AI articles: codespy.org/category/spring-ai